Parallel Chain Chainmaille Instructions
- Bracelet
- Chain Weave
- Intermediate Weaves
- Parallel Chain
- Weave
You'll need
- The Parallel Chain Bracelet Kit: instructions, enough 16g rings for 10 inches of chain, a shepherd’s hook clasp, earwires and twisty ties, packed in a tin
- or the Parallel Chain Bracelet Kitpack: the rings for a bracelet
- or Parallel Chain inchpacks (round or square wire) from the ring chart below, one per inch of chain
- A clasp
- Two pairs of smooth-jawed pliers
- Tools and ring closing: see How to Make Chainmaille Jewelry
About Intermediate Weave Kits
Our Beginning Weave Kits each contain information on the sorts of tools you need to make chain and on how to close rings perfectly. At the Intermediate level, it’s assumed you know those things and the information isn’t repeated here. If you need that information, you will find it in our how-to instructions.
About Parallel Chain
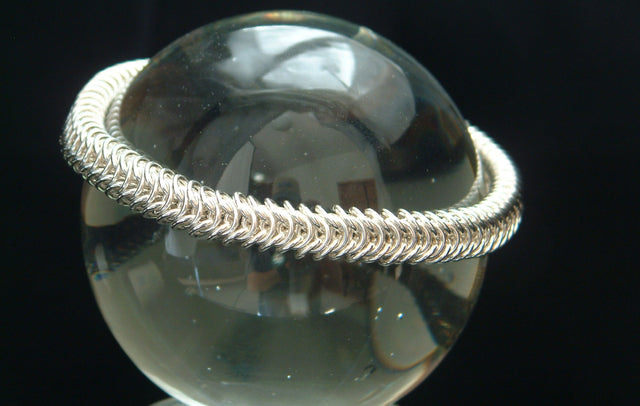
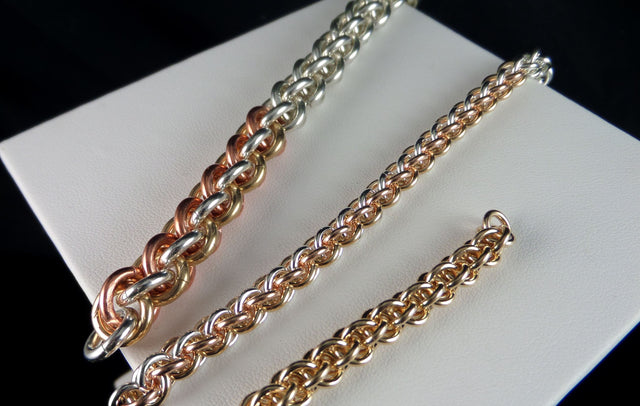
In learning to weave Parallel Chain, you’ll be introduced to the concept of captive rings. A captive ring is one that’s held in place by those around it, yet has no rings passing through it. Parallel Chain is a versatile jewelry weave that lends itself to a variety of applications, as is apparent from the number of our Journeyman Projects that depend on knowledge of this weave. Experience with Parallel Chain (also known as Helm Chain) will help make some of the more advanced jewelry weaves, such as Dragonscale, easier to grasp when trying them for the first time.

Weaving Parallel Chain
Step 1. Prepare your rings
Close 10 or more large rings and open at least 5 more. Open 10 of the smaller rings.
Step 2. Start the chain
Pick up an open small ring and scoop on 4 of the closed large rings, and close it. Put another open small ring alongside the one you just closed. Shake out your chain so it looks like the photos.


Step 3. The first captive ring
Pick up a large open ring and work it gently around the small closed rings in your chain. This ring does not pass through any other rings. Once you have the ring in place, close it smoothly. (These photos show the same step from two angles.)


Step 4. Sandwich it
Hold your little chain as shown and push the outermost large hanging rings upward, sandwiching them over the last ring you added.


Step 5. Small rings
Put a small open ring through the two rings you just pushed upright. Your chain should look like this.

Step 6. Two more large rings
Add 2 large closed rings and close the open ring. Add another small open ring alongside it. Shake out your chain to look like the second photo.


Step 7. The next captive ring
Let the large closed rings you just added fall to the sides. Pick up a large open ring and work it gently around the small rings, fitting it between the 4 large rings so there are 2 on either side of the new open ring. The photos show the point of insertion. Close that ring.


Step 8. Push up and add small rings
Push up the outermost large rings, sandwiching the captive ring between them. Put a small open ring through the two large rings you just pushed upright. Add 2 large closed rings, then close it. Add another small open ring alongside it.

Step 9. Fold back and repeat
Fold back the top set of rings and let them hang to the sides. Pick up a large open ring and work it into the space between the 4 large rings and around the 2 small rings, just as you did in step 7. Close that ring.
Repeat steps 8 and 9 until your chain reaches the desired length.


Attaching the clasp
The clasp is attached by opening the last set of two large rings at one end of your chain and putting the soldered clasp ring through them. Remove the loose ring at the base of the clasp and use two small rings to attach the last set of large rings in your chain to the clasp’s thick base ring. Use your pliers to gently squeeze closed or pry open the hook, if needed, to leave just enough room for the soldered ring to get through.
Congratulations, you’ve just made your first Parallel Chain bracelet… and it’s a beauty.
Polishing your bracelet
When you’ve finished making your bracelet, you might notice that the rings aren’t as bright and shiny as they were when you started. This is because working the metal rearranges its molecules, ruffling them up a bit. But no worries, you’ll soon have it shining brilliantly again.
There are lots of ways to polish silver, but simple and non-toxic is always best. Use an old toothbrush to give your new bracelet a thorough scrubbing in your hand with a paste of baking soda and water. Baking soda does wonders for silver, removing tarnish and bringing out the shine.
Now decide if you want the brilliant finish of shiny new silver or the muted gleam and depth of an antique finish. If you want it bright, it’s ready to wear. The silver will tarnish over time, especially if it’s exposed to sulfur or chlorine, but you can polish it shiny again with baking soda or a silver polishing cloth as often as you like.
You can polish your chains to a brilliant shine using a clean rock tumbler with mixed stainless steel shot as the tumbling media, along with water and a little plain dishwashing liquid. (If you have a choice, it’s better to get shot without pins so you don’t have to pick them out of your chains after tumbling.) Tumble polish for thirty minutes to several hours, according to your preference, and your chains will shine as brightly as our loose rings. We tumble polish every last one of them for 2–3 hours before sending them out in the world to make something of themselves.
Adding an antique finish
A beautiful antiqued look results from tarnishing the chain thoroughly, then polishing the tarnish from the high spots, leaving it dark in the crevices. Sulphur is a powerful tarnishing agent, available as a chemical (Liver of Sulphur), in the water of natural sulphur springs and in eggs. To use an egg, hard boil it and cut it in half while it’s still hot. Seal it in a plastic bag or dish with your bracelet, but arrange them so they aren’t touching, to avoid spotting the silver.
Leave it overnight, or until it’s dark enough. When it’s as dark as you like, wash and dry it thoroughly, then polish it with baking soda or in your tumbler or with a polishing cloth to shine up just the high spots. Tarnish wears off over time where it brushes against clothing and skin, but you can re-tarnish and re-polish as often as you like. Avoid getting bleach on your sterling, unless you want to tarnish it a dark grey.
Ring sizes for Parallel Chain
Each inchpack holds the small and large rings for one inch of chain. Choose round (RD) or square (SQ) wire.
Round wire (RD)
| Wire gauge (AWG) | Small rings | Large rings | Inchpack |
|---|---|---|---|
| 16g | 4.5mm | 7.0mm | Parallel Chain RD 16g Inchpack |
| 18g | 3.5mm | 6.0mm | Parallel Chain RD 18g Inchpack |
| 20g | 2.75mm | 4.5mm | Parallel Chain RD 20g Inchpack |
| 22g | 2.25mm | 3.5mm | Parallel Chain RD 22g Inchpack |
| 24g | 1.625mm | 2.875mm | Parallel Chain RD 24g Inchpack |
Square wire (SQ)
| Wire gauge (AWG) | Small rings | Large rings | Inchpack |
|---|---|---|---|
| 16g | 4.5mm | 7.0mm | Parallel Chain SQ 16g Inchpack |
| 18g | 4.25mm | 6.5mm | Parallel Chain SQ 18g Inchpack |
| 20g | 3.25mm | 5.0mm | Parallel Chain SQ 20g Inchpack |
| 22g | 2.25mm | 3.5mm | Parallel Chain SQ 22g Inchpack |
| 24g | 1.625mm | 2.875mm | Parallel Chain SQ 24g Inchpack |
What’s next
When you’ve mastered the Intermediate Weaves, you’re ready for our Journeyman Projects, an array of beautiful chain jewelry you can make using what you’ve learned.
Want everything in one box? See our Weave Kits and Project Kits.
FAQ
Do I need to know another weave first?
No. Parallel Chain is an Intermediate Weave. It assumes you can open and close rings neatly, but no specific weave is required.
What is a captive ring?
A ring held in place by the rings around it, with no rings passing through it.
Is Parallel Chain the same as Helm Chain?
Yes, Parallel Chain is also known as Helm Chain.
How are the small rings added?
Always two at a time.
Why learn Parallel Chain?
Many Journeyman Projects use it, and it makes advanced weaves such as Dragonscale easier to grasp.
© 2004 Urban Maille, Inc.® All Rights Reserved.