Flower Chain Chainmaille Instructions
- Beginning Weaves
- Bracelet
- Chain Weave
- Flower Chain
- Weave
You'll need
- The Flower Chain Bracelet Kit: enough 18g rings for 10 inches of chain, plus a clasp
- or the Flower Chain Bracelet Kitpack: rings only, for refills
- or Flower Chain inchpacks in any gauge from the ring chart below, one per inch of chain
- Two pairs of smooth-jawed jewelers’ pliers
- A twisty tie to mark the start of your chain
- Opening and closing rings new to you? Read How to Make Chainmaille Jewelry first (free)
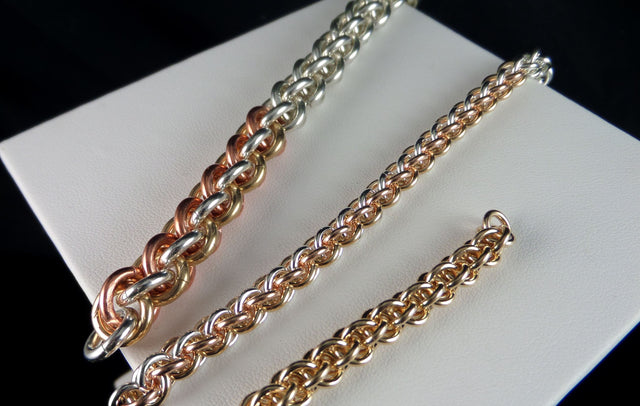
About Flower Chain
Flower Chain is a Beginning Weave: you learn it from scratch, with no other weave needed first. Besides the weave itself, it teaches two techniques that lay the best possible foundation for more advanced chainwork: getting good closures on rings with a large aspect ratio, and getting good closures on rings that are full of other rings.
The rings that make up the flowers have a larger aspect ratio than you’ll see among the other Beginning Weaves. The challenge in closing large aspect ratio rings is their relative flimsiness. The trick is to cross the tips well over each other, more than you would with rings of a smaller aspect ratio, to create the greatest possible tension in the metal, so that when you bring the ends in line they push hard against one another. Do this without putting a permanent bend in the ring opposite the opening, and without pringling the ring.
Both the permanent bend and pringling come from using too much or uneven force when closing the ring. Use slow, gentle pressure to cross the tips at first; with practice you’ll learn exactly how much pressure the metal can take, and your speed will improve.
When attaching the flowers together, you’ll practice closing rings that are packed full of other rings. There’s no trick to it other than taking your time and finding the best grip with your pliers so they don’t slip off the ring and scar it. You’ll use this skill a lot, so take the time to develop it well now.
Weaving Flower Chain
Subtract the length of your clasp from your ideal finished bracelet length to find how long to make your chain. There are two stages: first you make the flowers, then you link them together. The larger 18g/5.0mm rings make the flowers; the smaller 18g/4.0mm rings are the connecting rings that link them.
Making the flowers
Step 1. Join two rings
Pick up an open ring with your pliers, scoop a closed ring onto it, then close the open ring. Focus on closing the ring as perfectly as possible.


Step 2. Rotate the right ring
Hold each of the two rings in your fingertips and/or plier tips and rotate the one on the right clockwise (turning the top of the ring up and away from you) as far as it will go.

Step 3. Add the third ring
Slip an open ring through both of those rings and close it.


Step 4. Fish scales
While holding the first ring, turn the one you just closed clockwise as far as it will go, so the rings are arranged like overlapping fish scales.

Step 5. Set the flower aside
Push the rings together and take the flower between the tips of your pliers without disturbing the arrangement. Lay it neatly to the side of your work surface.


Step 6. Make a dozen
Repeat these steps until your first dozen flowers are made and laid out on your work surface.
Then pour out a small mound of 18g/4.0mm rings and open about two dozen.

Linking the flowers
Step 7. Hold a flower
Pick up a flower with the fingertips of your non-dominant hand and hold it without disturbing the arrangement. If you drop it or it slips out of shape, just rearrange the rings so they overlap like fish scales, as before.

Step 8. Through the center
Pick up an open ring with your pliers and slip it through the center of the flower, making sure it goes through all three rings that make up the flower.

Step 9. Add a second flower
Pick up a second flower and put it on the same open ring. Carefully position the tips of your pliers for a firm but gentle grip and close the ring. If you have trouble finding a grip because the ring is so full, be patient and jiggle the rings to settle and reposition them.


Step 10. Double the link
Once the ring is closed smoothly, put another open ring through the same two flowers so it lies alongside the ring you just added, and close it precisely as well. It might feel slightly more awkward than the first, but take your time; it gets easier as you go.
You now have two flowers linked by two rings. Put a twisty tie through one of the flowers so you have something to hold as you add to the chain.


Step 11. Keep adding flowers
Pick up another open ring, put a flower on it, run it through the last flower on your chain and close it. Add a second ring alongside the one you just closed.

Step 12. Measure and finish the length
Repeat step 11 until all your flowers are joined. Measure the chain and use that figure to estimate how many flowers you’ll need for your desired length. Make up the rest of your flowers, link them all together and measure again until your chain is only the length of the clasp away from just right.
Attaching a clasp
Here’s one way to attach a hook clasp. Join the loop of the hook to the last flower on one end of your chain using two 18g/4.0mm connecting rings.
Attach the eye of the clasp to the last flower on the other end by opening each ring of that flower and putting them one by one through the eye ring. This makes the eye snug, but secure. If the hook fits too snugly through the eye, you can instead connect the eye to the flower with a set of two 18g/4.0mm connecting rings.

Congratulations on finishing your first flower chain!
Reducing the spiral
Turning the flower rings clockwise makes the chain develop a very slight, natural spiral along its length. It’s rarely an issue in bracelets or necklaces and usually adds to the movement. If you need a straighter, more symmetrical piece, make half the flowers as instructed (second ring turned clockwise before adding the third) and the other half the other way (second ring turned counterclockwise). Then alternate them as you link: clockwise, counterclockwise, clockwise, and so on. This won’t completely eliminate the spiral, but it substantially reduces it.
Ring sizes for Flower Chain
Each gauge uses two ring sizes: the larger ring makes the flowers and the smaller ring connects them. These are the sizes we cut for Flower Chain; each inchpack holds all the rings for one inch of chain.
| Wire gauge (AWG) | Flower rings | Connecting rings | Inchpack |
|---|---|---|---|
| 12g | 10.0mm | 7.0mm | Flower Chain RD 12g Inchpack |
| 14g | 8.5mm | 6.0mm | Flower Chain RD 14g Inchpack |
| 16g | 7.0mm | 5.0mm | Flower Chain RD 16g Inchpack |
| 18g | 5.0mm | 4.0mm | Flower Chain RD 18g Inchpack |
| 20g | 4.0mm | 3.0mm | Flower Chain RD 20g Inchpack |
| 22g | 3.0mm | 2.5mm | Flower Chain RD 22g Inchpack |
These sizes are made for our sterling rings. Argentium and copper rings are usually slightly looser in large aspect ratios than traditional sterling, because of springback.
Variations
Use flower elements as hinges between beaded segments on bracelets and necklaces; this is especially dramatic in larger gauges. You can use more than three rings in a flower, but the more rings you use, the larger the aspect ratio of the rings needs to be.
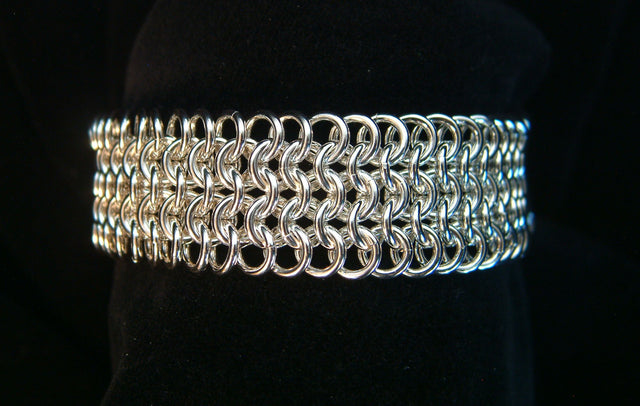
Connect flower elements to each other in a grid to turn this rope weave into a sheet weave. Three parallel rows of flower chain, joined at the sides with pairs of connecting rings, make a simple and beautiful wider bracelet.

Another sheet version connects flower elements in circles of six flowers around a seventh in the center, a form of Japanese maille using flowers in place of the doubled larger rings. Triangle or diamond shapes work well as earrings or on necklaces. The connecting rings are doubled around the outside, but the spokes to the inner flower are single rings, because the 18g/5.0mm flower rings can’t quite fit them all; use a larger aspect ratio for the flowers to double the rings throughout. Japanese maille that fits snugly when flat is too rigid for a bracelet; to curve around a wrist or neck it must look a bit loose when lying flat.

What’s next
When you know the Beginning Weaves, you’re ready for the Apprentice Projects. Byzantine is a good next weave: see our free Byzantine Chainmaille Instructions.
FAQ
Do I need to know another weave first?
No. Flower Chain is a Beginning Weave and you learn it from scratch.
Which rings make the flowers?
The larger rings: 18g/5.0mm in the bracelet kit. The smaller 18g/4.0mm rings connect the flowers.
How do I close large aspect ratio rings without gaps?
Cross the tips well past each other to build tension, then bring the ends in line so they push hard against each other. Use slow, gentle pressure so you don’t bend or pringle the ring.
Why does my chain spiral?
The clockwise rotation of the flower rings causes a slight spiral. Alternate clockwise and counterclockwise flowers to reduce it.
How long should I make the chain?
Subtract the length of your clasp from your ideal finished bracelet length.
© 2003–2010 Urban Maille, Inc.® All Rights Reserved.