Byzantine Watch Chainmaille Instructions
- Apprentice Project
- Byzantine Watch
- Chain Weave
- Project
- Watch
You'll need
- The Byzantine Watch Kit: 18g/3.5mm, 18g/5.0mm and 20g/2.0mm sterling silver rings, a handmade sterling silver box clasp, a watchhead with pins (optional) and a spring bar tool
- or the Byzantine Watch Kitpack: rings only
- Two pairs of smooth-jawed jewelers’ pliers
- Thin string such as dental floss, or fine wire (optional, to hold the pin rings together)
- Experience required: Byzantine. See our free Byzantine instructions
About this project
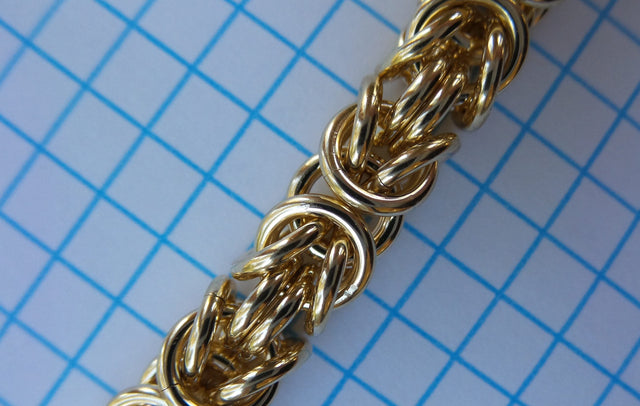
The band is woven in Olivia Chain, a Byzantine variation with larger center rings.
This Apprentice Project Kit contains everything needed to complete the project, but it does not teach the weave listed as Experience Required. If you don’t know Byzantine, learn it first; you’ll find it among our Beginning Weaves.
Making the watch
Step 1. Plan the length
Decide on the planned length of the finished watch, then subtract two inches for the combined length of the watchhead and clasp. Multiply the remaining length (in inches) by two: that’s the number of Byzantine segments you’ll need.
For example, if your total watch length is to be 7.5 inches, subtract 2 inches, leaving 5.5 inches. Multiply that by two and you’ll find that you need to make eleven Byzantine segments.
Making the Byzantine segments
There are two ways to make your segments. Method A is the same way you’d weave a continuous length of Byzantine chain. It’s a bit slower for segments, but it’s familiar. Method B can only be used for individual segments; it’s faster but probably unfamiliar, so it will be slower at first. Read both and choose the one you prefer.
Method A: make your segments from 18g/3.5mm rings, but use 18g/5.0mm rings for the center. Begin the segment with a 2-2-2 chain of 18g/3.5mm rings. Fold back the rings as usual, then lock them in place with two 18g/5.0mm rings. Use 18g/3.5mm rings to complete the segment. The pattern for one segment is 2-2-2-Fold-2-2-2-Fold-2, where the large 2 is the pair of 18g/5.0mm center rings.
Method B: make a 2-2-2-2-2 chain in which all the rings are 18g/3.5mm except the center pair, which are 18g/5.0mm. It’s easiest if you begin by closing two 18g/5.0mm rings, closing four 18g/3.5mm rings and opening eight 18g/3.5mm rings. Pick up an open ring, scoop two closed 18g/3.5mm rings and both 18g/5.0mm rings onto it and close it. Add another open ring alongside it. Pick up an open ring, scoop the other two closed rings onto it, add it to the 18g/5.0mm rings in your small chain and close it; add another open ring alongside. Make your usual Byzantine fold at one end of that little chain and lock it down with two of the remaining open rings. Turn the chain over, make the same fold at the other end and lock it down with the last two open rings. You now have one Byzantine segment.
Step 2. Make the segments
Using the method of your choice, make the number of segments you calculated in Step 1.
Connecting the segments
Open (not wide) some 18g/3.5mm rings and lay them out on your work surface. You’ll need four for each segment you’ve made, plus sixteen more.
Step 3. Fan the center rings
Pick up a segment and separate the center rings at one end so they fan apart.

Step 4. Insert an open ring
Pick up an open ring with your pliers and insert it down through the two fanned-out rings on one side of the segment.

Step 5. Join a second segment
Let the segment dangle from your pliers while you pick up another segment and fan apart its top two rings. From below this time, insert the open ring through the two rings in the same position on the new segment. The arrow in the photo shows where the end of the open ring enters the first of those two rings.
Close that ring and put a second open ring alongside it, so the segment ends are connected by two 18g/3.5mm rings side by side. (All the rings in this project are paired.)

Step 6. Join the other ends
Turn the joined segments upside down and connect the other ends in exactly the same way. Always enter the first segment between the fanned-out rings, and enter the same rings on the second segment from beneath.
Step 7. Add a third segment
Connect a third segment to the two you’ve already joined, returning to Step 3 if you need a refresher.

Step 8. Make two bands
Continue joining segments until the band reaches from about the middle top of the wrist to the middle bottom of the wrist. Set it aside and assemble the other side of the band in exactly the same way. One side will probably need to be longer than the other for the watch to fit properly, as you’ll see when you shape it to your wrist.
Step 9. Prepare the band ends
Add two pairs of rings at one end of each band, as though you were going to connect another segment, and close them. Put two more pairs of rings through those. Set the bands aside.
Attaching the watchhead
Step 10. Close the tiny rings
Close 18 tiny rings (24 if attaching the Desert Glow watchhead) as perfectly as you possibly can. Lay each one inside the jaws of your pliers and lightly squeeze it to make sure it’s flat. Set them aside in two equal piles.
Step 11. Practice with the pin
Pick up one of the watch pins and the spring bar tool and put the pin in the watch for practice, to see how it works. Try to get good at it, because it’s harder when the pin is full of rings. Remove the pin when you’ve finished practicing.
Step 12. The tricky part
Put a watch pin through the two dangling rings on one side of one band, then put nine tiny rings on the pin (twelve for the Desert Glow), then the other two dangling rings from the band. The pin will be very full. Insert the pin into the watchhead using the forked tip of the spring bar tool or the tips of your chainnose pliers. This isn’t easy, so breathe deeply, stay calm and gently work with it until you get it in place.
You might find it helpful to thread a thin string, such as dental floss, or a piece of fine wire through the rings alongside the pin to hold them together while you assemble the pieces. It also keeps the small rings from flying across the room if that springy little pin slips. It gets much easier with practice, and that practice will serve you well later when you want to remove the band for tumble polishing.

Step 13. The second band
Once the pin is in place, congratulate yourself on that new skill, admire your fine workmanship, then attach the watchhead to the other band the same way. The hard part is finished. Yay!
Attaching the clasp
Put an open ring on the other end of the band (as though to add another segment) and then through the matching loop on the clasp. Make sure the clasp is turned right side up. The fit will be a little snug for the second ring, so work it gently through the loop; it helps if the ring isn’t open any wider than necessary.
If the loops on the clasp seem too small for two rings, which might happen because of the natural variance in handmade components, don’t be concerned: one ring through each loop is strong enough to be perfectly secure. Attach the second loop of the clasp the same way, then connect the other band to the opposite side of the clasp and congratulate yourself on your lovely new chainmaille watch.
Polishing your watch
Your watchhead won’t benefit from being submerged in water, so take precautions when you clean and polish. Tumble polishing is the best way. Remove the watchhead and thread a scrap wire (silver or copper; no base metal to contaminate your tumbler) through the rings where the pins should be. Twist the ends of the scrap wire together, leaving plenty of room for the rings to move, and tumble polish the band and clasp.
If you don’t have a tumbler yet, use an old toothbrush and a paste of baking soda and water to gently scrub the band in the palm of your hand. Rinse well and pat dry to avoid water spots. You can also use a jewelry polishing cloth to shine just the high spots, leaving the metal darker within the weave for an antiqued look.
Ring sizes: Olivia Chain
The watchband is woven in Olivia Chain, the Byzantine variation used here. To make Olivia Chain as a bracelet, see our Olivia Chain kitpacks or the Olivia RD 18g Inchpack. Each inchpack holds the rings for one inch of chain.
| Wire gauge (AWG) | Small rings | Center rings | Inchpack |
|---|---|---|---|
| 18g | 3.5mm | 5.0mm | Olivia RD 18g Inchpack |
Want everything in one box? See our Weave Kits and Project Kits.
FAQ
What do I need to know first?
Byzantine. The Byzantine Watch is an Apprentice Project and this guide doesn’t teach the weave.
How many segments do I need?
Subtract 2 inches (watchhead plus clasp) from the total watch length and multiply by two. A 7.5-inch watch needs eleven segments.
Method A or Method B?
Method A is the familiar way of weaving Byzantine. Method B is only for individual segments; it’s faster once you’re used to it.
How many tiny rings go on each pin?
Nine (twelve for the Desert Glow watchhead), between the two pairs of dangling band rings.
Can I submerge the watch to clean it?
No. Remove the watchhead first; then tumble polish the band and clasp or scrub them gently with baking soda paste.
© 2003–2008 Urban Maille, Inc.® All Rights Reserved.