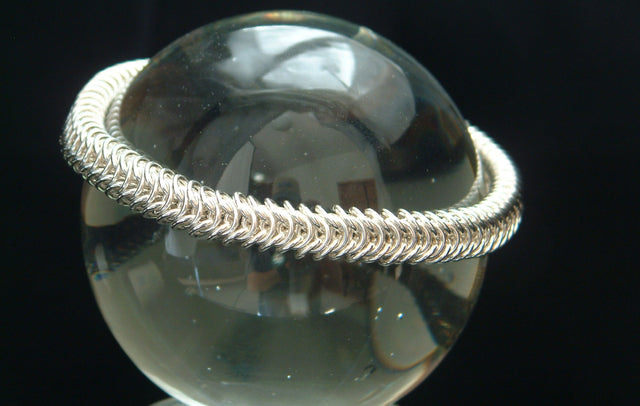
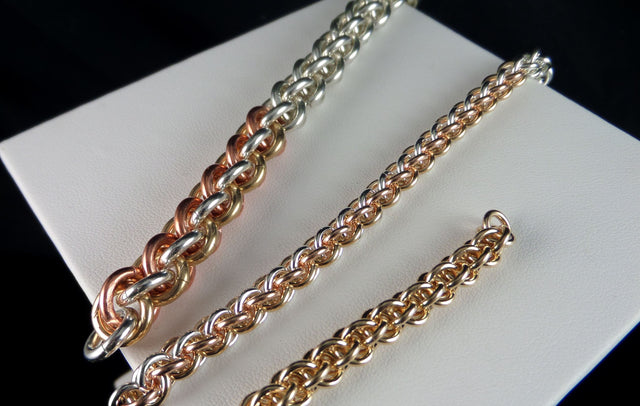
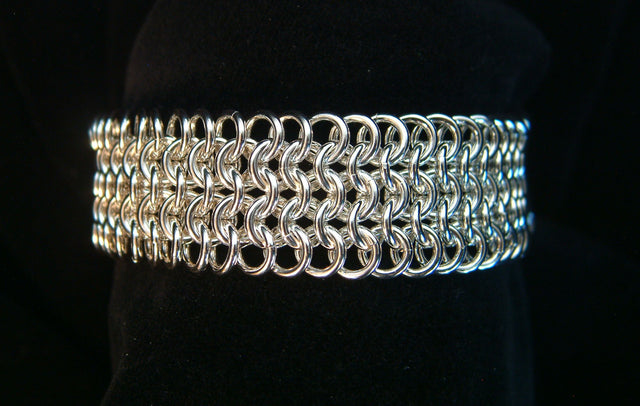
3-in-3 Chain Chainmaille Instructions
- 3-in-3 Chain
- Beginning Weaves
- Bracelet
- Chain Weave
- Weave
You'll need
- The 3-in-3 Chain Bracelet Kit: rings and a clasp for a bracelet up to 10 inches
- or the 3-in-3 Chain Bracelet Kitpack: rings only, for refills
- or 3-in-3 Chain inchpacks in any gauge from the ring chart below, one per inch of chain
- Two pairs of smooth-jawed jewelers’ pliers
- A twisty tie to hold the start of your chain
- Opening and closing rings new to you? Read How to Make Chainmaille Jewelry first (free)
About 3-in-3 Chain
3-in-3 Chain is a Beginning Weave: you learn it from scratch, with no other weave needed first. Besides the weave itself, each of our Beginning Weaves teaches specific techniques that lay the best possible foundation for more advanced chain weaving skills. 3-in-3 Chain is all about precision.
Simple 3-in-3 and 2-in-2 chains are usually ignored by instructors in favor of more glamorous, flashy weaves. Everyone loves a flashy weave, but complex patterns and multi-angled reflections can disguise poor workmanship. 3-in-3 Chain, with its perfect rows of straight lines and evenly spaced reflections, makes imperfect closures and pringled rings glaringly obvious, so a lack of skill in those areas can’t be overlooked. So while it looks like the easiest of our Beginning Weaves, a beautiful result actually takes a considerably higher level of basic skill.
Besides dramatically improving your workmanship, you’ll find these patterns endlessly useful in future projects, especially when you need a beautiful chain that complements your focal point without competing with it.
Closing the third ring in each row is challenging, especially once you move on to speedweaving, because you have very little room to work. Be patient and gently find the best grip with your pliers so they don’t slip. If they do slip and gouge a ring, toss it in your scrap pile and get another. No matter how awkward it seems the first time, it gets much easier with practice. Closing rings precisely in tight spaces is a skill you’ll use often in more advanced chain work.
Weaving 3-in-3 Chain
Subtract the length of your clasp from your ideal finished bracelet length to find how long to make your chain. Pour out a small mound of 16g/5.0mm rings.
Step 1. Open and close
Open about a dozen rings and lay them out on your work surface. Close three rings as smoothly and perfectly as you can.
Step 2. The first link
Put an open ring through the three closed rings and close it, again focusing on pristine closures and keeping your rings nice and flat.
Slip a twisty tie through the three closed rings, fold it in half and twist the ends together. It gives you something to hold as you add rings. If you don’t have a twisty tie handy, you can put the first three rings through one of the soldered rings on your clasp and use it as your handle.


Step 3. The second ring
Pick up another open ring, put it through all three rings on the twisty tie and close it so it lies neatly alongside the last ring you added.

Step 4. The third ring
Pick up a third open ring and put it through all three rings attached to the twisty tie. Close it so it lies alongside the last two rings you added.

Step 5. Check your work
Examine your closures and make sure they’re lined up as smoothly as possible. Each ring should lie neatly parallel to its neighbor, and each group should look like three straight lines without a gap that would show a ring is pringled rather than flat.
If you notice any pringling, press the wavy ring firmly between the tips of your pliers to flatten it, then neaten up the closure. If that doesn’t fix it, replace the ring now; it’s much more troublesome to do later.
Step 6. Keep adding rows
Continue adding three open rings to the previous row of three closed rings until your chain is two rows short of the length you need (minus the clasp), or until you’re ready to move on to speedweaving. Speedweaving is never required; if you prefer adding one ring at a time, carry on that way.


Speedweaving
Step 7. Scoop three rings
Pick up an open ring, scoop three closed rings onto it, thread it through the last three rings in your chain and close it.
Step 8. Second ring
Pick up another open ring, thread it through the same six rings the last ring went through, and close it.
Step 9. Third ring
Pick up a third open ring, thread it through those same six rings and close it. This ring will be the most challenging to close.
Repeat steps 7 to 9 until your chain is two rows short of the total length you want.
Attaching a clasp
Here’s how to attach an S clasp. Use your pliers to gently open and shape the clasp: open one loop of the S enough to fasten without too much difficulty, but not so much that the bracelet might come unhooked by accident.
Use three open rings to attach the last row of closed rings on your chain to the soldered ring on one end of the clasp. Turn the chain and use three more open rings to attach the other end to the other soldered loop on the clasp.


Congratulations on completing your first 3-in-3 chain!
Ring sizes for 3-in-3 Chain
These are the sizes we cut for 3-in-3 Chain; each inchpack holds all the rings for one inch of chain.
| Wire gauge (AWG) | Ring size (mandrel) | Inchpack |
|---|---|---|
| 12g | 7.5mm | 3-in-3 Chain RD 12g Inchpack |
| 14g | 6.0mm | 3-in-3 Chain RD 14g Inchpack |
| 16g | 5.0mm | 3-in-3 Chain RD 16g Inchpack |
| 18g | 3.75mm | 3-in-3 Chain RD 18g Inchpack |
| 20g | 3.0mm | 3-in-3 Chain RD 20g Inchpack |
| 22g | 2.5mm | 3-in-3 Chain RD 22g Inchpack |
| 24g | 1.875mm | 3-in-3 Chain RD 24g Inchpack |
Beyond the basics: 2-in-2 and 1-in-1 chains
You’ll find that simple 3-in-3, 2-in-2 and 1-in-1 chains are endlessly useful in your designs. When making 1-in-1 chains, be especially careful to always use the thickest, smallest ring that will work in the design, so that it’s strong.
Whenever possible, use a 2-in-2 chain rather than a 1-in-1. Not only is it stronger, it’s more balanced. Elements such as dangles that are suspended with two rings hang straight and face front, rather than twisting from side to side as they do when attached with only one ring.
2-in-2 Chain
| Wire gauge (AWG) | Ring size (mandrel) | Inchpack |
|---|---|---|
| 12g | 5.5mm | 2-in-2 Chain RD 12g Inchpack |
| 14g | 4.5mm | 2-in-2 Chain RD 14g Inchpack |
| 16g | 3.5mm | 2-in-2 Chain RD 16g Inchpack |
| 18g | 2.75mm | 2-in-2 Chain RD 18g Inchpack |
| 20g | 2.25mm | 2-in-2 Chain RD 20g Inchpack |
| 22g | 1.75mm | 2-in-2 Chain RD 22g Inchpack |
| 24g | 1.625mm | 2-in-2 Chain RD 24g Inchpack |
1-in-1 Chain
| Wire gauge (AWG) | Ring size (mandrel) | Inchpack |
|---|---|---|
| 12g | 5.0mm | 1-in-1 Chain RD 12g Inchpack |
| 14g | 4.0mm | 1-in-1 Chain RD 14g Inchpack |
| 16g | 3.0mm | 1-in-1 Chain RD 16g Inchpack |
| 18g | 2.0mm | 1-in-1 Chain RD 18g Inchpack |
| 18g | 2.0mm half round | 1-in-1 Chain HR 18g Inchpack |
| 20g | 1.5mm | 1-in-1 Chain RD 20g Inchpack |
| 22g | 1.5mm | 1-in-1 Chain RD 22g Inchpack |
What’s next
When you know the Beginning Weaves, you’re ready for the Apprentice Projects. Byzantine is a good next weave: see our free Byzantine Chainmaille Instructions.
Want everything in one box? See our Weave Kits and Project Kits.
FAQ
Do I need to know another weave first?
No. 3-in-3 Chain is a Beginning Weave and you learn it from scratch.
Why is 3-in-3 Chain good for beginners?
Its straight rows and even reflections show every imperfect closure and pringled ring, so it trains you to close rings precisely.
What size rings does the bracelet kit use?
16g/5.0mm rings.
What is speedweaving?
An optional faster method: scoop three closed rings onto one open ring, thread it through the last row and close it, then add two more rings through the same six rings.
How do I fix a pringled ring?
Press it firmly flat between the tips of your pliers and neaten the closure. If that doesn’t work, replace the ring right away.
When should I use 2-in-2 instead of 1-in-1?
Whenever possible: 2-in-2 is stronger and more balanced, and dangles hung on two rings face front instead of twisting.
© 2003–2010 Urban Maille, Inc.® All Rights Reserved.