Vortex Medallion Instructions
- Journeyman Project
- Medallion
- Parallel Chain
- Project
- Vortex
Updated for our new Instructions library. The design and ring sizes are the same.
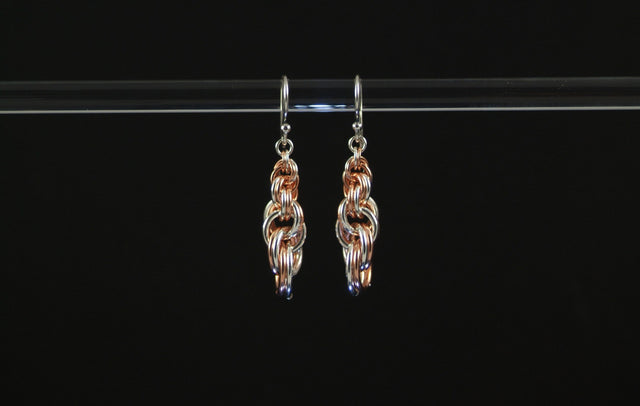
Vortex Medallion is the name of our version of this beautiful and much loved design by Norwegian mailler, Kenth Kutschera.
You'll need
- One Vortex Medallions RD 18g Unitpack (or another gauge from the chart below) for each medallion
- Two pairs of flat nose pliers for most of the Mobius; one flat nose and one chain nose for the last ring
- Familiarity with Parallel Chain: see our free Parallel Chain instructions
About the Vortex Medallion
The Vortex Medallion is a clever combination of Parallel Chain and a Mobius Rose. Parallel Chain is also commonly called Helm Chain, but we'll stick with Parallel here.
Most Parallel Chain uses 2 ring sizes: large rings that lie parallel, joined by smaller connectors. For these medallions we use 3 connector rings on each set. On the smaller medallions all 3 connectors are the same size; on the larger ones the outer two connectors are larger and the center connector is a touch smaller, which tightens the look because the center ring doesn't quite touch the large rings.

Steps
Step 1: Make the Parallel loop
This tutorial doesn't teach Parallel Chain, but it does show you how to close the loop. Weave Parallel until you have 4 sections. To complete the loop, thread one of the larger rings through the last connector set, skip the last captured ring, and connect the last ring to the first set with the last 3 connector rings. Then thread the last captured ring around the final connector set, and finally thread the very last outside ring through the last two connector sets.


Step 2: Start the Mobius
The completed Parallel loop is the structure for the Mobius. Because the Mobius links corner to corner through each Parallel set, the Vortex can spiral in either direction. Ours are made left to right; the opposite direction works just as well. For earrings you might want one of each. The first Mobius ring sets the direction.
Open the first ring and loop one end anywhere through the center of the Parallel loop. Flip the piece over and guide the end into the space just below the right of any connector set. Flip it back, rotate the ring so it comes out of the same right opening on the other side, and close it so it lays flat. Both sides should look the same.


Step 3: Thread the rest of the Mobius
In a Mobius, every ring passes through every earlier ring. The second passes through the first; the third through the first and second; and so on, until the fifth passes through all four before it. Guide each ring through the previous Mobius rings, then through the next Parallel set. Weave in order. The pendant tightens with each addition, so don't skip a row.
For rings 2 through 4, open the rings a bit wider than usual (about 30 degrees). Two pairs of flat nose pliers work well for all but the last ring.


Step 4: Screw the last ring into place
Open the fifth ring about 35 to 40 degrees. The design is now too tight to pass the end straight through the middle. From the top, screw it into position. If you open it too much or too little it will lock before it clears both sides; once you find the sweet spot it rotates into place easily.


Step 5: Close the last ring
When the end of the fifth ring pokes through the final connector set, you'll have just enough room to hold the tip. Switch to one flat nose and one chain nose for the tight space. Bring the ends closer in stages rather than forcing a full close at once. As the ends meet you'll gain a little play, can rotate the join into the open, and finish the closure.


Close the final ring, and the Vortex Medallion is complete.
Ring sizes (from our active unitpacks)
Order one unitpack per medallion. Full charts live on the Vortex Medallions round ring size page.
| Unitpack | Rings in the pack |
|---|---|
| RD 12g | 20×12g/12.0mm, 10×14g/7.5mm, 5×14g/7.0mm |
| RD 14g | 20×14g/9.5mm, 10×16g/6.0mm, 5×16g/5.75mm |
| RD 16g | 20×16g/7.5mm, 15×18g/4.75mm |
| RD 18g | 20×18g/6.0mm, 15×20g/3.75mm |
| RD 20g | 20×20g/4.75mm, 15×22g/2.875mm |
| RD 22g | 20×22g/3.75mm, 15×24g/2.25mm |
| RD 24g | See the ring size page / unitpack |